


One of the first things I do in the morning is to check Instagram, which makes me feel a little embarrassed to admit.
But I am aware that I am not alone.
Did you know that by 2023, Instagram would have over two billion users, up from just one million in December 2010?
It’s actually one of the most widely used social media sites worldwide. You may be asking yourself, “How do I use this platform?”
A poll on Instagram is a great way to interact with your audience.
Quiz or poll stickers are one of the most widely used Instagram Story formats, according to HubSpot research.
You can conduct market research and stay in touch with your audience by using polls.
In this article, let’s discover how
Step 1: Swipe left on Instagram
The first step in using Instagram polls is to launch the application. After that, swipe left. The screen where you can post on your Stories will appear after you click this.
Step 2: Be sure to post to Story (underneath the record button)
Make sure you post to your Story once you arrive here. You can see whether you’re posting a Story, a Reel, or going Live underneath the record button.
Make sure you’re posting to your Story if you want to post a poll.
Step 3: Make the image or video that you want to post
Simply take the image or video that you want to post right now.
If you have it saved, all you need to do is click the photo icon in the bottom left to choose the content from this screen. This will bring up your camera roll where you can choose a picture or video.
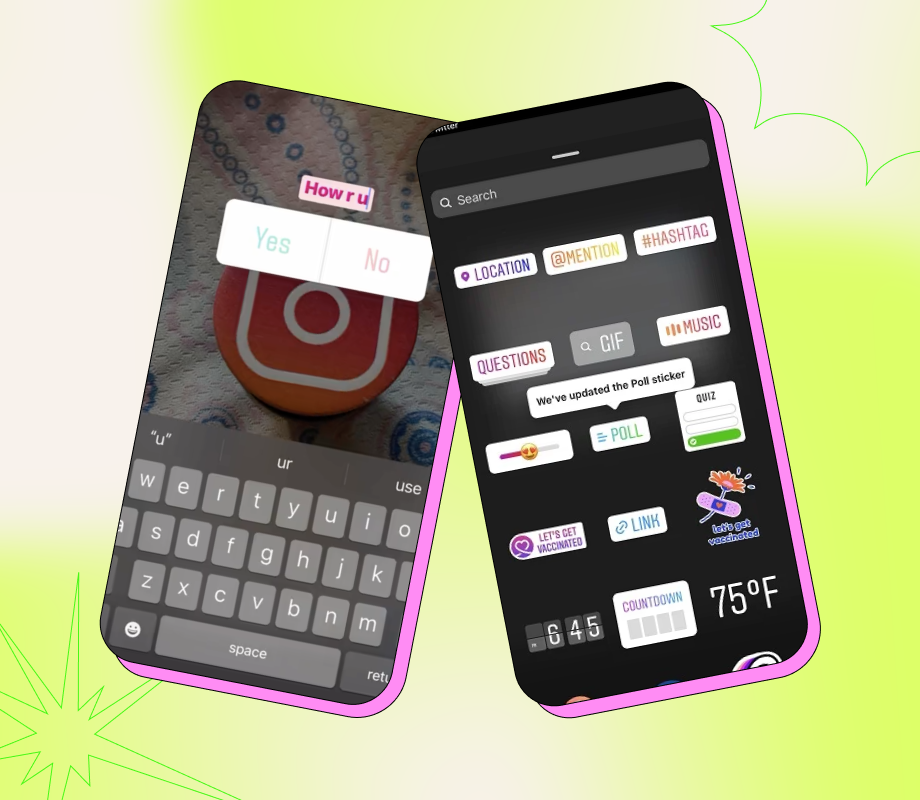
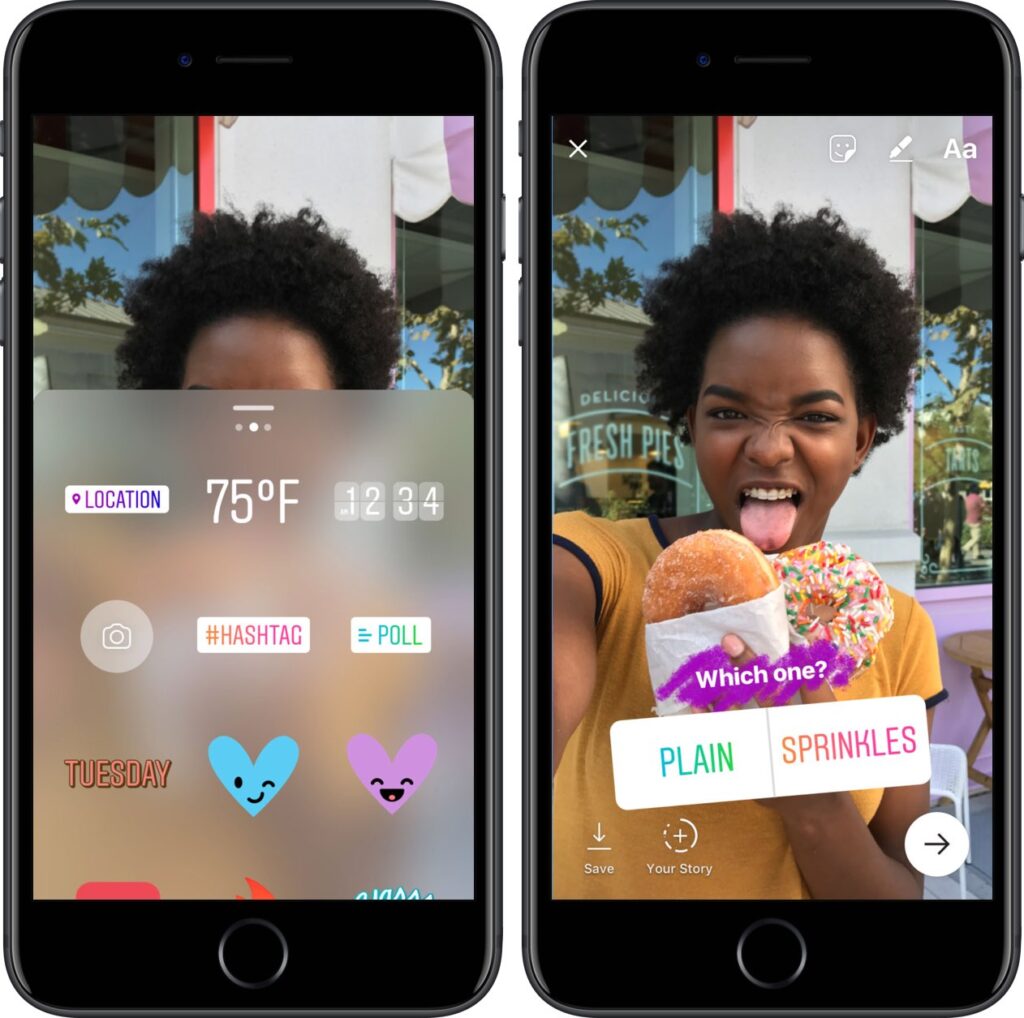
Step 4: On the top right, Select the sticker icon
Click the sticker icon in the top right to add the poll. From the left, it is the third icon.
Step 5: Look for the sliding poll or scroll down and select poll
Read More: How to Cancel the Amazon Gift Card | Three Ways
You ought to now see a variety of sticker choices, including ones for location, time, questions, and more. Select the poll icon as you scroll down.
A sliding poll or a poll with questions and answers are both options. You must scroll until you see the slide bar option if you want to select a sliding poll.
Step 6: Type in the question and responses
It’s time to type in your question and any potential answers if you selected the question and answer poll.
You should type your question and then an emoji to the slide bar if you went with that option.
Step 7: After sharing your poll to your Story, click “Send To”
Posting is now the only thing left to do. Simply click “Send To” and share the post on your Story to accomplish this.
Step 8: Track Results
It’s time to wait for the results after posting a poll. You should watch your Stories to see the results.
Click the “Seen by” icon located in the bottom left corner after that. This will display the voters and the outcomes.
A “Share Results” button is also present here. To inform your viewers of the poll’s results, click that and post the results to your Story.
Keep this in mind when creating polls and where to place them.
You don’t want voters to have difficulties casting their ballots due to the placement. Verify that your poll is positioned close to the center, neither too high nor too low so that the other Story icons obstruct it.
Conclusion
The main goal of using Instagram polls is to interact with your followers and grab their attention. If you want to learn how to unvote on Instagram poll, please read our article. We have provided very simple instructions that you can follow.